| Saltisgood created the Texture Tool for ME3Explorer. |
| This tool is functional in release 109k/revision 653, broken in revisions 654-732, and removed with r733. This article has been updated for ME3Explorer v3.0, is in archival state and shouldn't be edited unless the tool is returned to the toolset. |
Texture Tool was developed very early during the lifecycle of the toolset as something of a "Texplorer Lite." The purpose was to make commonly-modded textures replaceable with a single click, preventing users from having to learn the intricacies of the more complex, Texplorer. Building me3tree.bin prior to texture replacement is not required with Texture Tool, because specific textures and all PCC references are hard-coded into the tool.
The algorithm used for texture replacement with this tool is equivalent to Texplorer's "Replace Largest," however, there is an important distinction. Using Texture Tool will not create a new CustTextures0.tfc. Instead, it will overwrite the present texture in whatever cache file (TFC) it's currently stored. That means when replacing a vanilla texture, it will overwrite the texture inside Textures.tfc, and when replacing a modded texture, it will overwrite the texture inside CustTextures0.tfc (or wherever it's located).
Usage
Texture Tool is designed to use raw texture files (DDS format), not TPF or MOD files. Any replacement texture must be identical in format to the vanilla texture. It currently works for only one texture: Shepard's Cabin Photo.
To use the tool:
- Go to User Tools > Textures > Texture Tool.
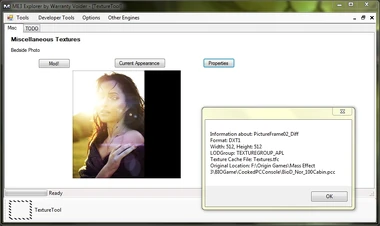
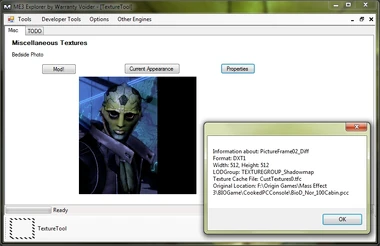
- Clicking Current Appearance will display the current cabin photo texture, modded or unmodded. You may click it at any time.
- Clicking Properties will show some technical information about the current cabin photo, including the name, format, size, LOD group, cache location, and PCC references.
- To change the texture, you must have a properly formatted DDS texture available. Information on creating one can be found in the Making Your Own Cabin Photo tutorial.
- Once you have a useable texture, click Mod!. In the window that opens navigate to the location of the replacement texture on your PC. Select it and click Open.
- The tool automatically runs a TOC update after texture replacement. When it asks about applying updates, click Yes. When the “done!” window pops up, click “Ok”.