| Do not enter! This article is currently under construction and should not be used for reference. If you need help, visit the forums. |
This tutorial covers how to add new (i.e. not present in the vanilla game) PCC-stored GUI textures to DLC mods.
Background[]
GUI textures include war assets, codices, notifications, etc. The article is especially directed to modders who want to add their own GUI textures without modifying the vanilla game. Two methods are available to do so : the first preserves the vanilla name of the PCC, while the second allows you to create a new file name alltogether, which leads to the PCC having his own folder in Texplorer.
The cool thing is that once the mod user does his own Texplorer scan on your DLC mod, it will create a new hash for the new textures, unique and therefore different from any hash present in the vanilla game. This applies to both methods and theoretically means that these new GUI textures could be replaced with Texmod, among other interesting features.
The main difference between the 2 methods is that while the first one keeps the same name as in the vanilla game, the second method changes it alltogether, creating a brand new PCC that can be completely independent of the vanilla game. The second method involves a bit more technical tinkering too.
Requirements[]
- ME3Explorer rev717. You need a working Texplorer tree, which will also have to be rebuilt in the course of this tutorial. So backup your me3tree.bin if you want to restore it later, it is located in :
- ..\ME3Explorer\exec\ or
- ..\ME3Explorer\bin\Debug\exec\
- Knowing what DLC Mods are, how to build them and how to use them is required to fully understand this article. See how to build a DLC Mod.
- Reading the PCC_File_Format article will certainly help too.
Method 1 : Preserving the vanilla PCC name[]
PCC Editor 2.0 & ME3Creator
- Choose the PCC you want to be working on. The PCC you choose must be chosen from the main game's ..\CookedPCConsole directory. Do not use a DLC PCC; testing hasn't been done for them and they may not work as intended.
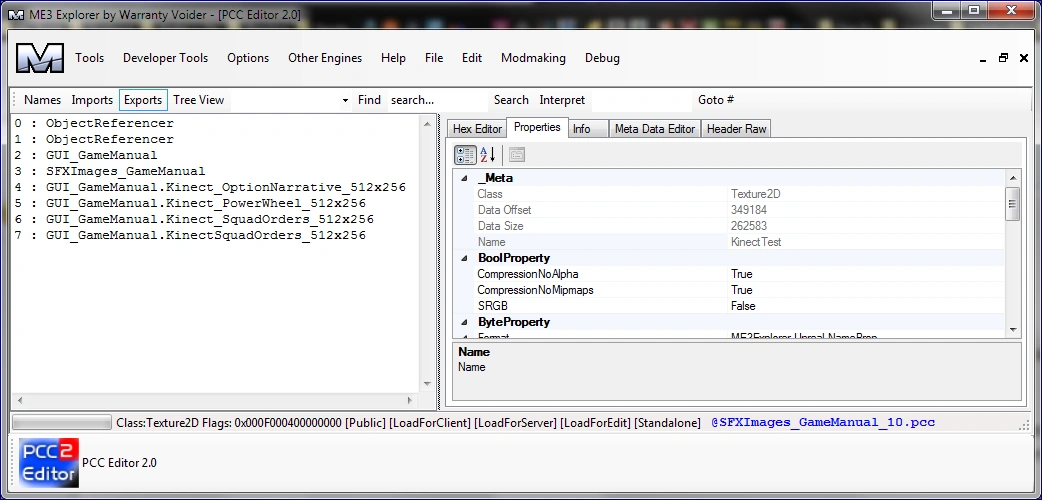
- We will be using SFXImages_GameManual_10.pcc for this tutorial, but you can use whichever one you want. If you open the file in PCC Editor 2.0, it should look similar to the image below.
- We will be using SFXImages_GameManual_10.pcc for this tutorial, but you can use whichever one you want. If you open the file in PCC Editor 2.0, it should look similar to the image below.
- Copy the desired PCC from the ..\CookedPCConsole directory to your DLC mod folder. Then, open it in ME3Creator using File > Open PCC.
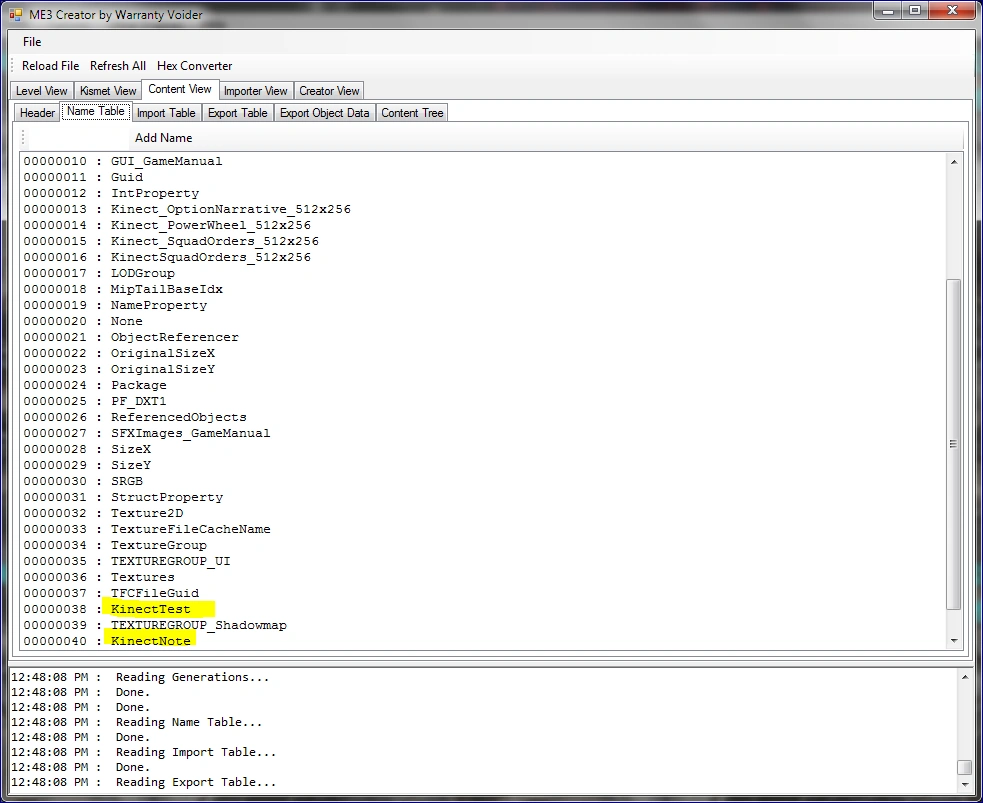
- Click on the Content View tab, then the Name Table subtab. Use the Add Name field at the top left to add the names for your new images. Be sure to spell them exactly like you want them to appear in the files. They'll look similar to this when finished:
- Next, click on the Export Object Data tab. You will have to clone one of the existing images to create your new image. Select any of the images listed, and click Clone Entry in the tab's menu. Add as many clones as you want new images. We will experiment with 2.
- Now, you need to switch the current cloned image's names to the new names you added.

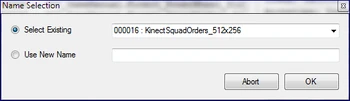

- To do so, select the Export Table tab. Select a cloned texture and double-click on the Name field to its right. In the dropdown menu that pops up, select one of the names you previously added to the name list.
- Repeat for each cloned texture, giving them all new names. Here is how it should look at the end.

- Before closing ME3Creator, go into the Export Table tab, and for each new texture, change the Index field, give it the same value as the vanilla textures. This will probably be "0". Once you're finished, don't forget to File > Save, then close ME3Creator.
Texplorer & Coalesced
- Do an AutoTOC to update your PCConsoleTOC.bin.
- To include your newly cloned textures in the Texplorer tree, you need to do a Texplorer scan by clicking Rebuild Database and following the instructions given. You don't need to include all DLCs for this scan, you can only include your DLC mod and restore your backuped me3tree.bin afterwards. The scan should take approximately 10mn.
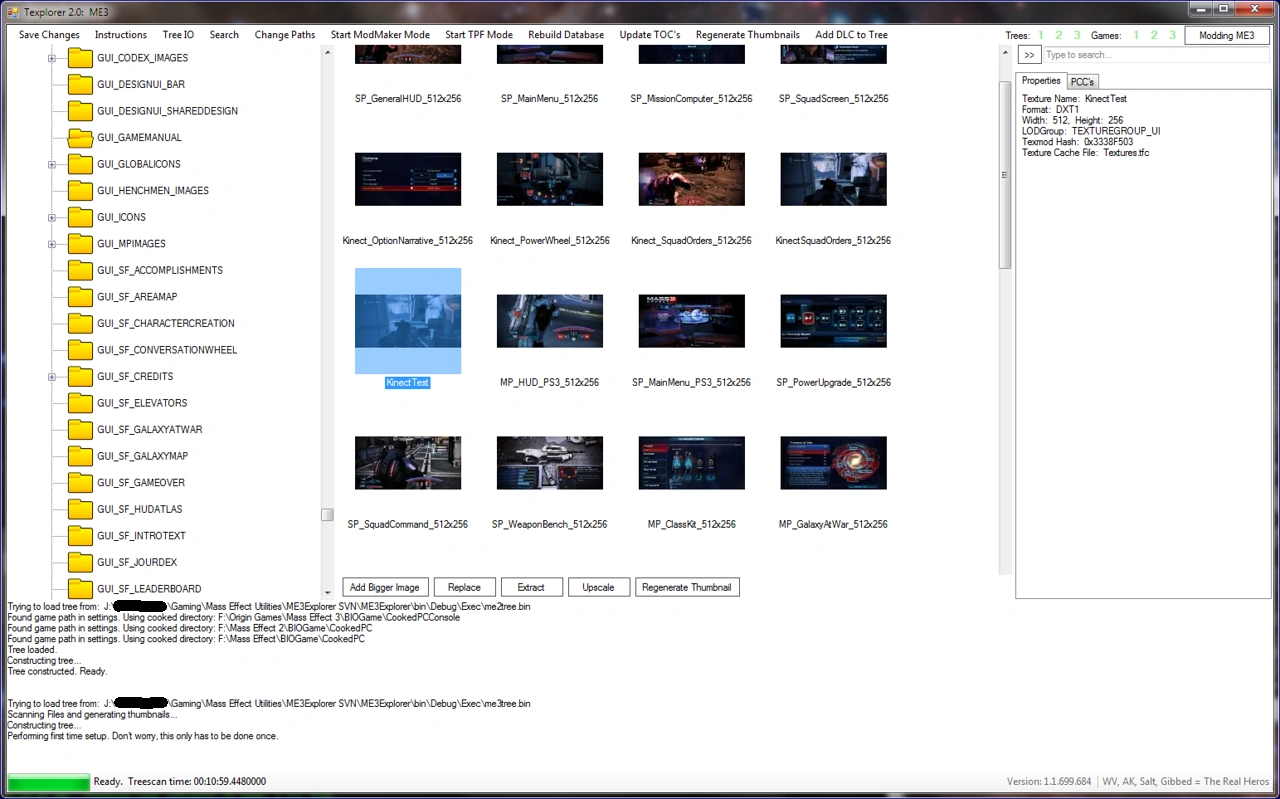
- After the scan, the new texture will be located in the same tree folder as the source textures you cloned and will share the same image. Browse for it using Texplorer. Here is an example :
- To change them to your custom textures, use Texplorer's Replace function to, you guessed it, replace the texture. Repeat for each new texture you added. Don't forget to Save Changes before exiting Texplorer.

- Also note that while the new textures are only inside the DLC mod PCC, the vanilla textures are in both locations. It is possible to replace all vanilla textures in the DLC mod, as well as cloning in new ones.

- Coalesced edits. Next, set up your new "image pointers" in the Bioui.ini, or whatever you are adding in the game : GAW (Galaxy At War), codex, etc. Instructions on how to do that can be found here.
- Finally, before checking your new textures in game, there's one more step you should take for codices and possibly other GUI images. This step is unnecessary for GAW images. In the Bioengine.ini for your DLC coalesced, you must add a section that tells the game the location of each new image. Each texture you want to use in the PCC must be referenced. This includes vanilla textures. It should look like this:
- Last but not least, time to verify the images in game !

If you run into problems double check for typos in your coalesced, missing entries in your coalesced, and make sure you indeed saved your Texplorer changes.
Method 2 : Changing the vanilla PCC name[]
This part is slightly more technical, so let's begin with a short explanation of the "exports" based on the PCC SFXImages_GameManual_10.pcc. If you open the PCC in PCC Editor 2.0, it should look similar to the image below :
- Object Referencer -- references all the images in the PCC
- Object Referencer -- references the two Object Referencers
- GUI_GameManual -- the package that defines the Texplorer "folder"
- SFXImages_GameManual -- the package that is named after the file (for the most part)
- Textures -- use the name structure "folder_package.texture_name" (i.e., *GUI_GameManual.Kinect_OptionNarrative_512x256).
What you will need to change are the two package names for the folder and file.
PCC Editor 2.0 & ME3Creator
- Choose the PCC you want to be working on. The PCC you choose must be chosen from the main game's ..\CookedPCConsole directory. Do not use a DLC PCC; testing hasn't been done for them and they may not work as intended.
We will be using SFXImages_GameManual_10.pcc for this tutorial, but you can use whichever one you want.
- Copy the desired PCC from the ..\CookedPCConsole directory to your DLC mod folder.
- Rename the copied PCC to whatever pleases you. Remember that you'll also be using this name for one of your packages. I like to follow game conventions so I chose SFX_GUI_TMImages.PCC
- Then, open it in ME3Creator using File > Open PCC. Click on the Content View tab, then the Name Table subtab. Use the Add Name field at the top left to add :
- The name of your PCC (without the extension). This would give SFX_GUI_TMImages in my case.
- The name of the folder your images will be located in, which is also the suffix of the file name following Bioware's convention, ie GUI_TMImages in my case.
- Note that there's a chance the procedure won't work if you don't follow these nomenclature conventions, as the game seems to "expect" certain things work in certain ways, especially in DLCs.
- Next, use the Add Name field at the top left to add names for your new images. Be sure to spell them exactly like you want them to appear in the files. Save your file and close the tool. It'll look similar to this when finished:
- Next, click on the Export Object Data tab. You will have to clone one of the existing images to create your new image. Select any of the images listed, and click Clone Entry in the tab's menu. Add as many clones as you want new images. We will experiment with 2.
- Now, you need to switch the current cloned image's names to the new names you added.
- To do so, select the Export Table tab. Select a cloned texture and double-click on the Name field to its right. In the dropdown menu that pops up, select one of the names you previously added to the name list.
- Repeat for each cloned texture, giving them all new names. Here is how it should look at the end.
- Before closing ME3Creator, go into the Export Table tab, and for each new texture, change the Index field, give it the same value as the vanilla textures. This will probably be "0". Once you're finished, don't forget to File > Save, then close ME3Creator.
Texplorer & Coalesced
- Do an AutoTOC to update your PCConsoleTOC.bin.
- To include your newly cloned textures in the Texplorer tree, you need to do a Texplorer scan by clicking Rebuild Database and following the instructions given. You don't need to include all DLCs for this scan, you can only include your DLC mod and restore your backuped me3tree.bin afterwards. The scan should take approximately 10mn.
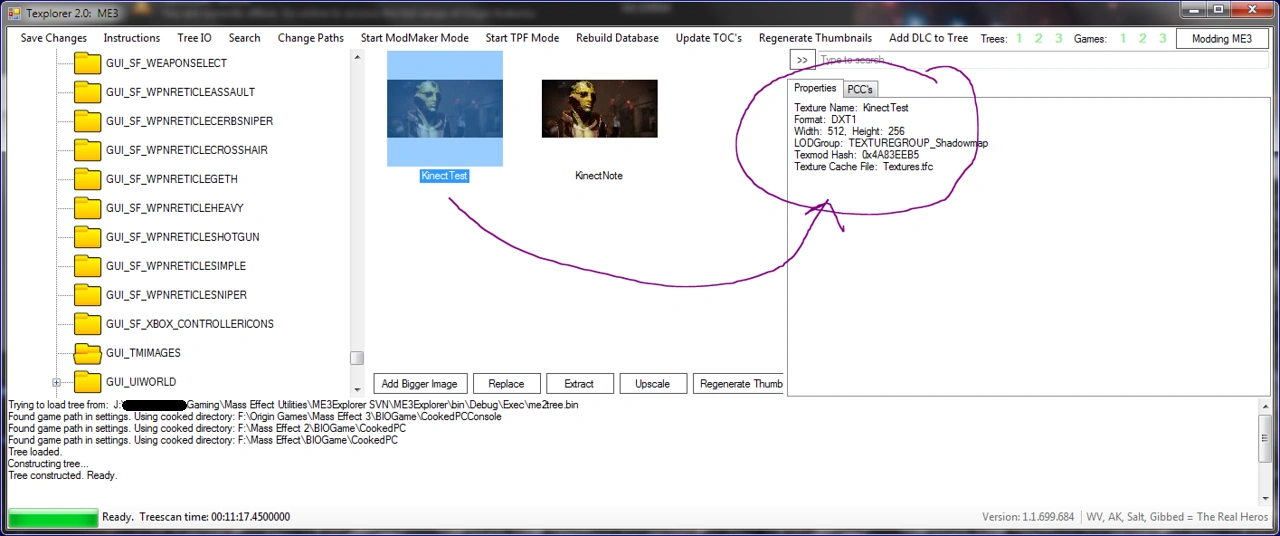
After the scan, the new texture will be located in a new Texplorer folder, which will bear the name we defined before, GUI_TMImages in my case. Browse for it using Texplorer. Here is an example :

- Interestingly, only the cloned and renamed textures will appear in this new folder. The vanilla images won't. This is probably because Texplorer places them only in one location, and an examination of the Debug file shows that it scanned the SFXImages_GameManual_10.pcc before the SFX_GUI_TMImages.pcc. As far as I can tell, this isn't a problem. The vanilla textures still refer to both PCCs, they just aren't displayed in both folders in Texplorer. I assume that if you change one of these vanilla textures, regardless of what "package" it's in (GUI_GameManual or GUI_TMImages), it will get changed in both places.
- Next, note that I did not change the GUID for the TFC. It remains the same as the vanilla TFC file. I don't see this as a problem. When swapping textures in PCC files, the TFC is not affected.
- To change the images to your custom textures, use Texplorer's Replace function to, you guessed it, replace the texture. Repeat for each new texture you added. Don't forget to Save Changes before exiting Texplorer.
- Also note that while the new textures are only inside the DLC mod PCC, the vanilla textures are in both locations. It is possible to replace all vanilla textures in the DLC mod, as well as cloning in new ones.
- Coalesced edits. Next, set up your new "image pointers" in the Bioui.ini, or whatever you are adding in the game : GAW (Galaxy At War), codex, etc. Instructions on how to do that can be found here.
Once these names are linked to the packages, the package names in the textures will change as well: 
- Finally, before checking your new textures in game, there's one more step you should take for codices and possibly other GUI images. This step is unnecessary for GAW images. In the Bioengine.ini for your DLC coalesced, you must add a section that tells the game the location of each new image. Each texture you want to use in the PCC must be referenced. This includes vanilla textures. It should look like this:
- Last but not least, time to verify the images in game !
| This tutorial has been adapted from the original by CreeperLava, as posted on the me3explorer Tutorial section. |